Tuesday, October 28, 2008

Using the washable blue marker

I love the washable blue marker. If you follow some basic guidelines it will work a charm everytime. The basic ink is produced in Japan, then packaged through different manufacturers. I like Dritz's Mark-B-Gone and Clover's Water Soluble Marker (Thick) for marking through stencils. For marking grids, I use Clover's thin version or the Water Erasable Fabric Marking Pen.

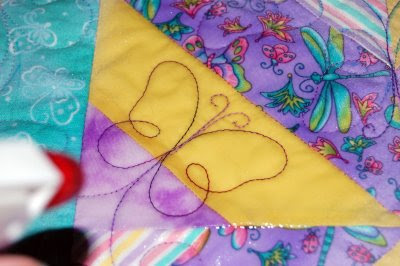
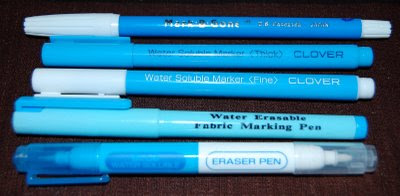
Some pens come with a blue water soluble marker at one end and a white eraser pen at the other. This is helpful when you need to remove a marked line in a small area. For larger areas, wet a paper towel with COLD water to lift the markings. You must wait for the fabric to dry before marking again or it will not hold the mark.

Never apply heat to blue washable markers or the ink can set and may reappear as brown lines. Mark with a light touch; the less ink you have to remove the better. Plan to mark, quilt, and remove the ink as soon as possible for best results.

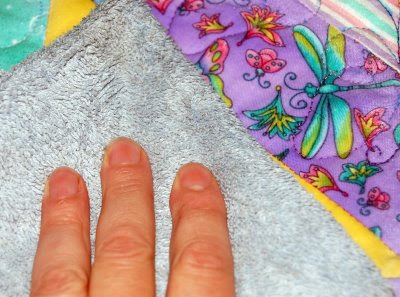
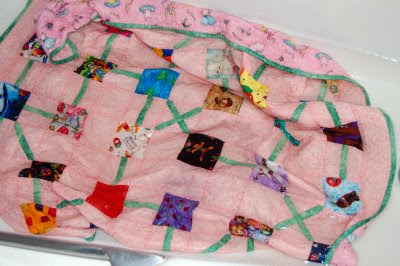
When quilting and binding is complete, submerge the quilt in COLD water. I use the bathtub for this step so I can see the lines disappear! Either continue to hand wash with a bit of Quilt Soap or Orvus Paste (Sodium Lauryl Sulfate) in the tub or use the washing machine. Remove excess water by rolling up in a terry towel or use the spin cycle of the washing machine. Lay the quilt flat to air dry or use the clothes dryer on a low setting for a few minutes. Finish with air drying.

Copyright ©2008, Sharon Baggs

Friday, October 24, 2008

Spray and blot

On the butterfly quilt I was curious what the thread looked like apart from the blue marking. I decided to use a "spray-and-blot" method to remove some of the blue marks. Complete removal comes later after binding.


Using a spray bottle of COLD water, saturate the blue lines.


Blot up the excess water/diluted dye with a terry towel.


When using the spray-and-blot method, it's important to dilute the blue dye as much as possible; a slight spray only temporarily fades the lines as the dye migrates into the batting. Traces of blue usually show up when the fabric dries again.

After binding, the quilt should be completely submerged in cold water to remove any remaining dye. Hand wash in the tub or in the washing machine with a bit of Orvus Paste (sodium lauryl sulfate), rinse, spin and dry on low for 5-10 mins. Lay the quilt out flat to finish air drying.

Copyright ©2008, Sharon Baggs

Tuesday, October 21, 2008

The butterfly quilt


Here is a fun quilt made by my friend, Diana. She came over to get some machine quilting tips, then decided to let me quilt it for her. The focus fabric features butterflies with a few dragonflies in the mix. Fortunately, I had stencils of both creatures on hand which made design choices easy.


Using a blue washable marker, the top was marked with a 7" butterfly continuous line design (RB42-Promise) in the center of each block. Tendrils were added free form during the quilting. Next I marked a dragonfly in the four corners (http://www.timesavertemplates.com/) Finally the border was marked with a companion stencil of the blocks (RB45-4 1/4" Promise Border).

The next decision was the thread. I played around with Superior's Perfect Quilter (a 30 wt. cotton) and kept getting skipped stitches no matter which needle I tried. Then I put in YLI Machine Quilting Thread (40wt. TEX, cotton) in both the top and bobbin and used this thread to quilt the blocks. This worked best with a 75/11 embroidery needle, which is a smaller needle but has a larger eye like a topstitch needle.


The other thread I used was Presencia 50/3 Color #261--light lavender on top and YLI in the bobbin for stitching-in-the-ditch and quilting the border.

The order of quilting: First stitch in the ditch through the diagonal seam lines, using a walking foot. This avoids stitching over any markings. Next stitch in the ditch along the inside border, all around the perimeter.

Next the internal blocks of butterflies and corner dragonflies were free motion quilted with a darning foot. Finish by quilting the outer border.


Copyright ©2008, Sharon Baggs

Sunday, October 19, 2008

Pink Quilt Finished!


A finished quilt is always a cause for great rejoicing. The pink quilt made its way across the street to 2-year-old Rose who was delighted with it and has been toting it out of the house and into the car according to her observant and proud neighbors.

Hannah tried free motion quilting, first on a practice piece. After a couple of minutes she said, "This takes practice!" But she kept on, writing her name and following the markings of a stenciled flower. She quilted Rose's name on the quilt near the top and I did the same at the bottom. She did a great job and demonstrated an I-can-do-it attitude which is imperative when approaching the art of free motion quilting.


Using a darning foot, I added some free-motion stitch-in-the-ditch around the green lines to get them to lie down flat and not pop up.


After the binding was on, we submerged the quilt in cold water in the bath tub to remove the blue water soluble markings. After a thorough rinsing, we took the quilt to the washing machine and spun out the excess water. At this point, we dried the quilt in the clothes dryer for just 10 minutes on a low heat setting. Hannah was somewhat surprised that the quilt had shrunk up a bit. This could be attributed to the batting more than the fabric, which I think was prewashed. Something to think about if you want a flat quilt with no compression around the quilting. Prewash fabric and soak the batting and dry on low heat to preshrink.


Copyright ©2008, Sharon Baggs

Thursday, October 9, 2008

Story quilt: the order of quilting

Hannah displays the progress on the pink quilt she pieced. Together we worked on the quilting. Here's what we did:


We domestic machine quilters "stitch in the ditch" to secure the seam lines before free motion quilting. A ditch is created by pressing seams to one side resulting in a high side and a low side. Use a walking foot and stitch so the machine needle sinks right into the low side of the seam. If seams are pressed open, stitching in the ditch is difficult because there is no ditch.

After using the walking foot for the first quilting lines in the ditch, I will sometimes switch to a different foot. The #10 foot for Bernina machines has an edge foot that rests right in the ditch. I used it here to stitch around the inner border.


After the grid of horizontal and vertical lines were quilted, stencil motifs of a butterly, flower, and heart were marked with a blue washable marker in some of the pink squares. After quilting and binding, remove the blue marking with COLD water.


A beautiful loopy heart border stencil fit this border perfectly. First I marked the corners and moved toward the center. Sometimes the spacing has to be eased in to make the design fit and sometimes it needs to be resized through reducing or enlarging the drawn design on a photocopier. This time it needed no altering. The variegated Mettler 100% cotton 50/3 used on top was paired with Presencia solid pink of the same weight and ply in the bobbin, stitched with a 80/12 machine needle. When you need to stop quilting and reposition your hands, it's best to stop where the design lines cross over, such as the bottom of the heart design, to insure a smooth stitching line.


A green binding was chosen to match the green story lines of the quilt. The strips were cut 2-1/4" on the straight of grain. Stitching the corner closed on both the front and the back keeps the corner crisp and neatly finished.


Copyright ©2008, Sharon Baggs