The interlocking design of a jigsaw puzzle can be used as an all-over quilting design. To make a template, lay a white piece of paper over a constructed puzzle and rub a crayon over the paper to transfer the design onto the paper.
The steps that follow serve as a mental exercise in seeing how this design will be quilted. If your quilt top is a grid of squares sewn together, all you will need to do is stitch-in-the-ditch between the seam lines and free-form quilt the interlocking piece shape--hills and valleys. But drawing it out first on paper will definitely help coordinate your hands and head when quilting this design.
The lines between the puzzle pieces will appear white and need to be darkened. Using a black permanent pen, start at the top left corner and trace the horizontal lines across to the right side, travel down to the next row and trace from right to left, repeating the process until you reach the bottom of the design.
Next trace the vertical lines with a red pen.
The manner in which the design is traced is the same path that will be taken for quilting. This is a basic grid that will vary in size depending on the size of the original puzzle pieces. The example here is a 1.5" grid. Begin with the horizontal black lines and continue with the vertical red lines.
To transfer the design to a quilt top, lay the marked design on a light table and trace onto the quilt top with a blue washable marker. When transferring a design to a heavier fabric such as flannel, try tracing the individual puzzle pieces onto the quilt top. This works best with jumbo sized puzzle pieces where the grid will be larger. Remember, you can "eyeball" it, but if you like following the blue line, mark it!
Puzzle piece quilting designs would look great on a kid's quilt top. I can't wait to try it out soon!
Copyright©2011, Sharon Baggs
Sunday, November 20, 2011
Wednesday, November 16, 2011
Sarah's skirt
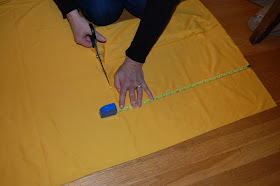
While visiting Sarah in Seattle recently, we made her a yellow stretch cotton skirt.
She wanted to make a waistband to use some 1.5" elastic. We cut the waistband the length of her waist and 4.5" wide. One end of the elastic was stitched onto the waistband, then the other end was overlapped 1/2" and stitched into place.This was folded down to make a 2.25" waistband. You will see stitching on only one side of the waistband, which you will want to have facing toward the body when joining the waistband to the skirt. Finally baste the raw edges together.
For the skirt, we used the full width of the fabric (selvedge to selvedge) and used the waist to knee measurement for the length of the skirt. For example, the full width will range from 45 - 60". The waist-to-knee measurement was 18-20". We trimmed the selvedge edges to make a smooth finished seam, which is sewn 1/2" and pressed open. Baste the top edges of the skirt to gather the fullness.
Taking this tube of skirt, pin the right side of the waistband to the right side of the skirt at the top raw edges. Ease in the fullness as the two pieces are pinned together.
Sew a 3/8" seam all around the top edge of the skirt to join the waistband to the skirt. Follow with a 1/2" or 5/8" seam to reinforce the stitching line. Once this is sewn securely, it is fine to remove the basting stitches.
Copyright©2011, Sharon Baggs


